Difference between revisions of "Vlcstreamer itunes transfer"
From Hobbyist Software
(Created page with "This article assumes you are using VLC Streamer on iOS, and that you are using VLC Streamer version 4.00 or later. == VLC Streamer is primarily about the streaming... == The...") |
|||
| (One intermediate revision by the same user not shown) | |||
| Line 10: | Line 10: | ||
# Tap on the computer you want to connect to | # Tap on the computer you want to connect to | ||
# 'Add a Movie' and select the file you want | # 'Add a Movie' and select the file you want | ||
| − | # Select a streaming quality and press | + | # Select a streaming quality and press 'Watch' |
| + | |||
| + | http://hobbyistsoftware.com/images/VLCStreamerImages/resolution.png | ||
This will stream the movie live to your iDevice without needing to copy it to the device. It uses VLC for the transcoding, so most movie formats are supported. | This will stream the movie live to your iDevice without needing to copy it to the device. It uses VLC for the transcoding, so most movie formats are supported. | ||
| Line 26: | Line 28: | ||
# Tap on the info button next to the movie | # Tap on the info button next to the movie | ||
# Select 'copy to device' | # Select 'copy to device' | ||
| + | |||
| + | http://hobbyistsoftware.com/images/VLCStreamerImages/copy-to-device.png | ||
Vlc streamer will copy the movie over wifi to your device | Vlc streamer will copy the movie over wifi to your device | ||
| − | VLC Streamer will continue to copy the movie | + | VLC Streamer will continue to copy the movie in the background once you exit the app. |
| − | |||
== You can also transfer through iTunes == | == You can also transfer through iTunes == | ||
Revision as of 13:00, 3 June 2015
This article assumes you are using VLC Streamer on iOS, and that you are using VLC Streamer version 4.00 or later.
VLC Streamer is primarily about the streaming...
The main purpose of VLC Streamer is to let you stream movies live without having to go through iTunes.
To do this,
- Launch VLC Streamer
- Tap on the computer you want to connect to
- 'Add a Movie' and select the file you want
- Select a streaming quality and press 'Watch'
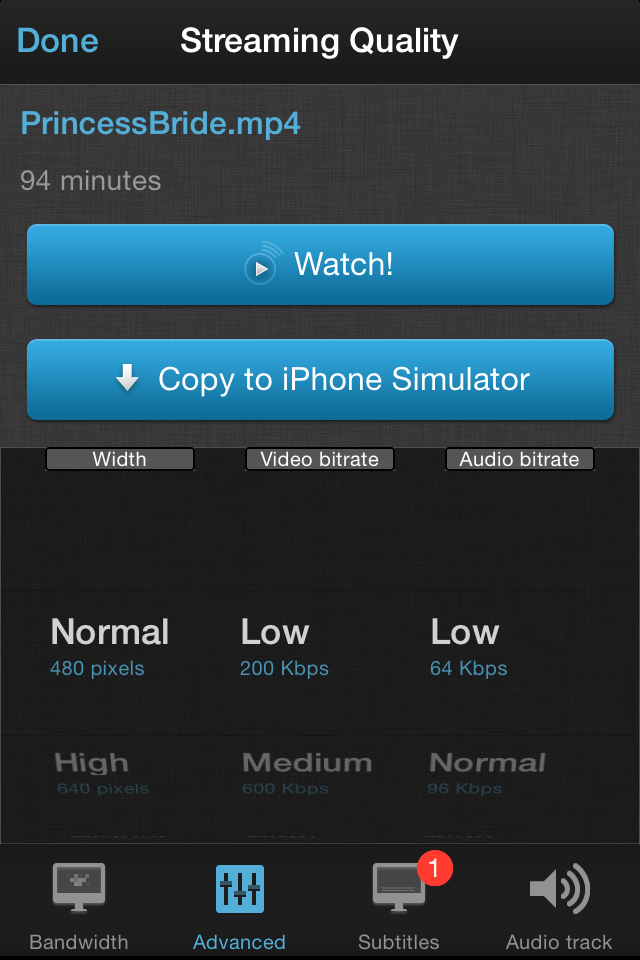
This will stream the movie live to your iDevice without needing to copy it to the device. It uses VLC for the transcoding, so most movie formats are supported.
You can now transfer movies directly to your device
This will allow you to watch the movies later when you are not connected to your wifi
- Select your movie as in the steps above
- Tap 'copy to device' instead of play
or, if you have already watched the movie, or have already set it converting, you can transfer from the movie list
- Tap on the info button next to the movie
- Select 'copy to device'
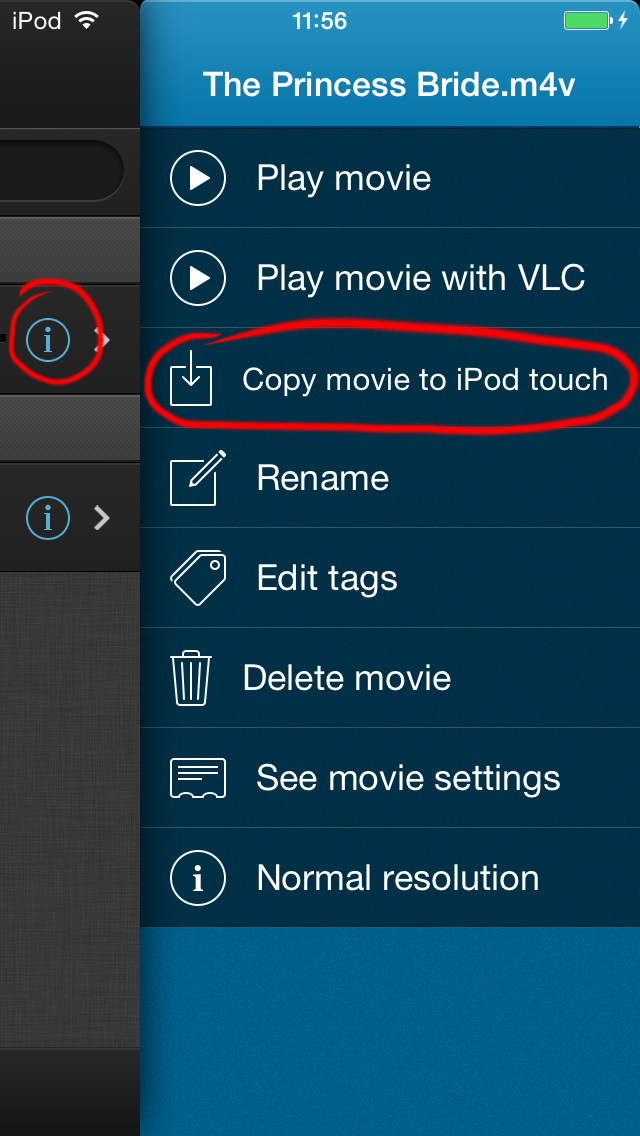
Vlc streamer will copy the movie over wifi to your device
VLC Streamer will continue to copy the movie in the background once you exit the app.
You can also transfer through iTunes
You can also transfer movies through iTunes. Unless the movie is an mp4 type, then VLC Streamer will use the vlc player code on the app to try to play it. This won't work for every movie - but it will work for most.
To transfer movies,
- Plug your iDevice into your computer
- Select your device in iTunes
- Select the Apps tab
- Scroll to the bottom of the page where you will see a 'Documents' section
- Select VLC Streamer on the left of the documents window, and drag your movie to the document list on the right.
This process is described in more detail in this Apple support article